2 Tutorial 2 – Slicing and Preparing Print Files
Slicing and Preparing Print Files
Amanda Shepp and Christopher Shepp
Welcome to RE3D Tutorial 2, which is written to directly follow Tutorial 1. If you are just joining us, the file we will be using can be found here, and we will be demonstrating the method using the MakerBot Print software, available for free here. In this tutorial, we are going to teach you how to properly load a 3D print file into the MakerBot Print software, how to prepare it for print request submission, and how to export it for the RE3D request form.
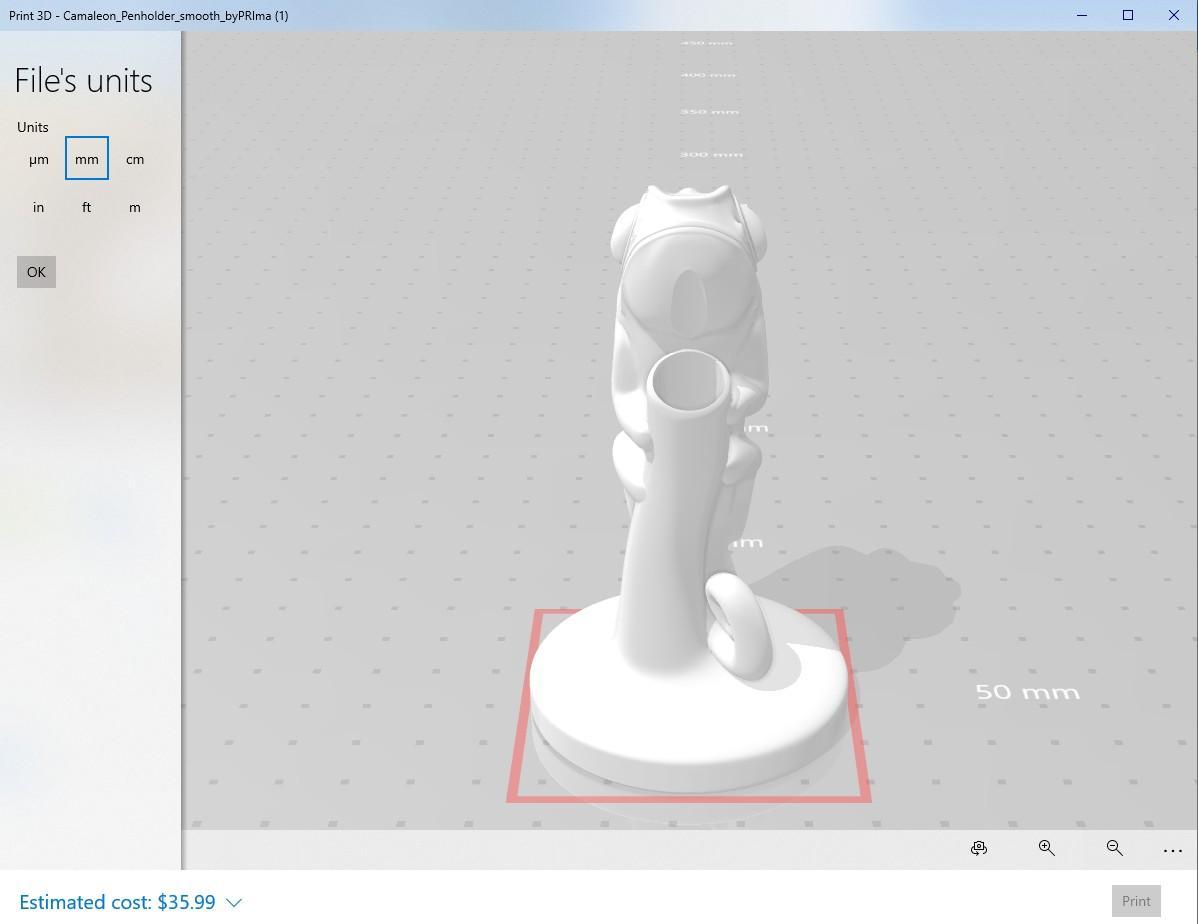
With the .stl file for our chameleon pen holder downloaded, we are almost ready to load it into the slicer software, but there are a few things back on the page we got it from to check first.
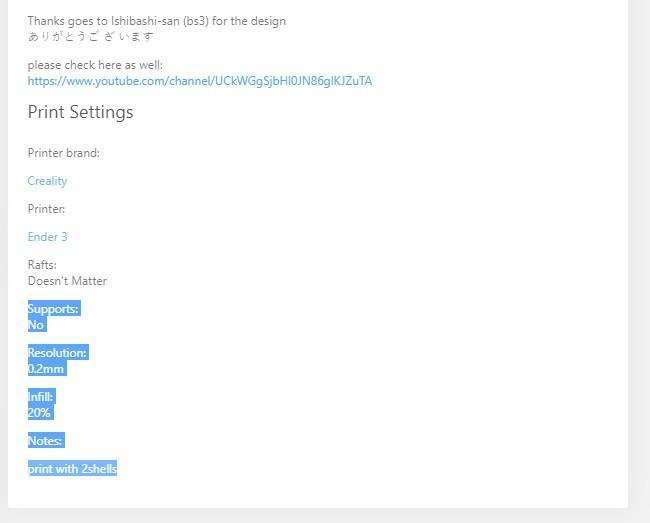
In the summary section of the Thingiverse page, after the creator’s description, we can find the suggested print settings. We don’t care what printer they used, and they don’t list a material (so it’s safe to assume PLA). The important bits to take away this time are Infill, Supports, Resolution, and Notes.
Supports: No – that means this support material, used to keep areas of the print that hang out over a gap (such as the area under an extended arm) from collapsing when printed, will not be needed.
Resolution: 0.2mm – resolution is the thickness of each layer of the print. .2mm is standard. This number can be lowered to get more detail, but 0.2mm is the standard layer thickness.
Infill: 20% – infill is the density of the support material used inside of the print. 20% is the default infill in MakerBot so it won’t need to be adjusted.
Notes: print with 2 shells – a shell is the full layer of material that makes up the outside of your print. More shells mean a tougher part but increases weight and print time. The standard number of shells in MakerBot Print is 2.
No major adjustments will be needed for this print.
Now we can open Makerbot Print.
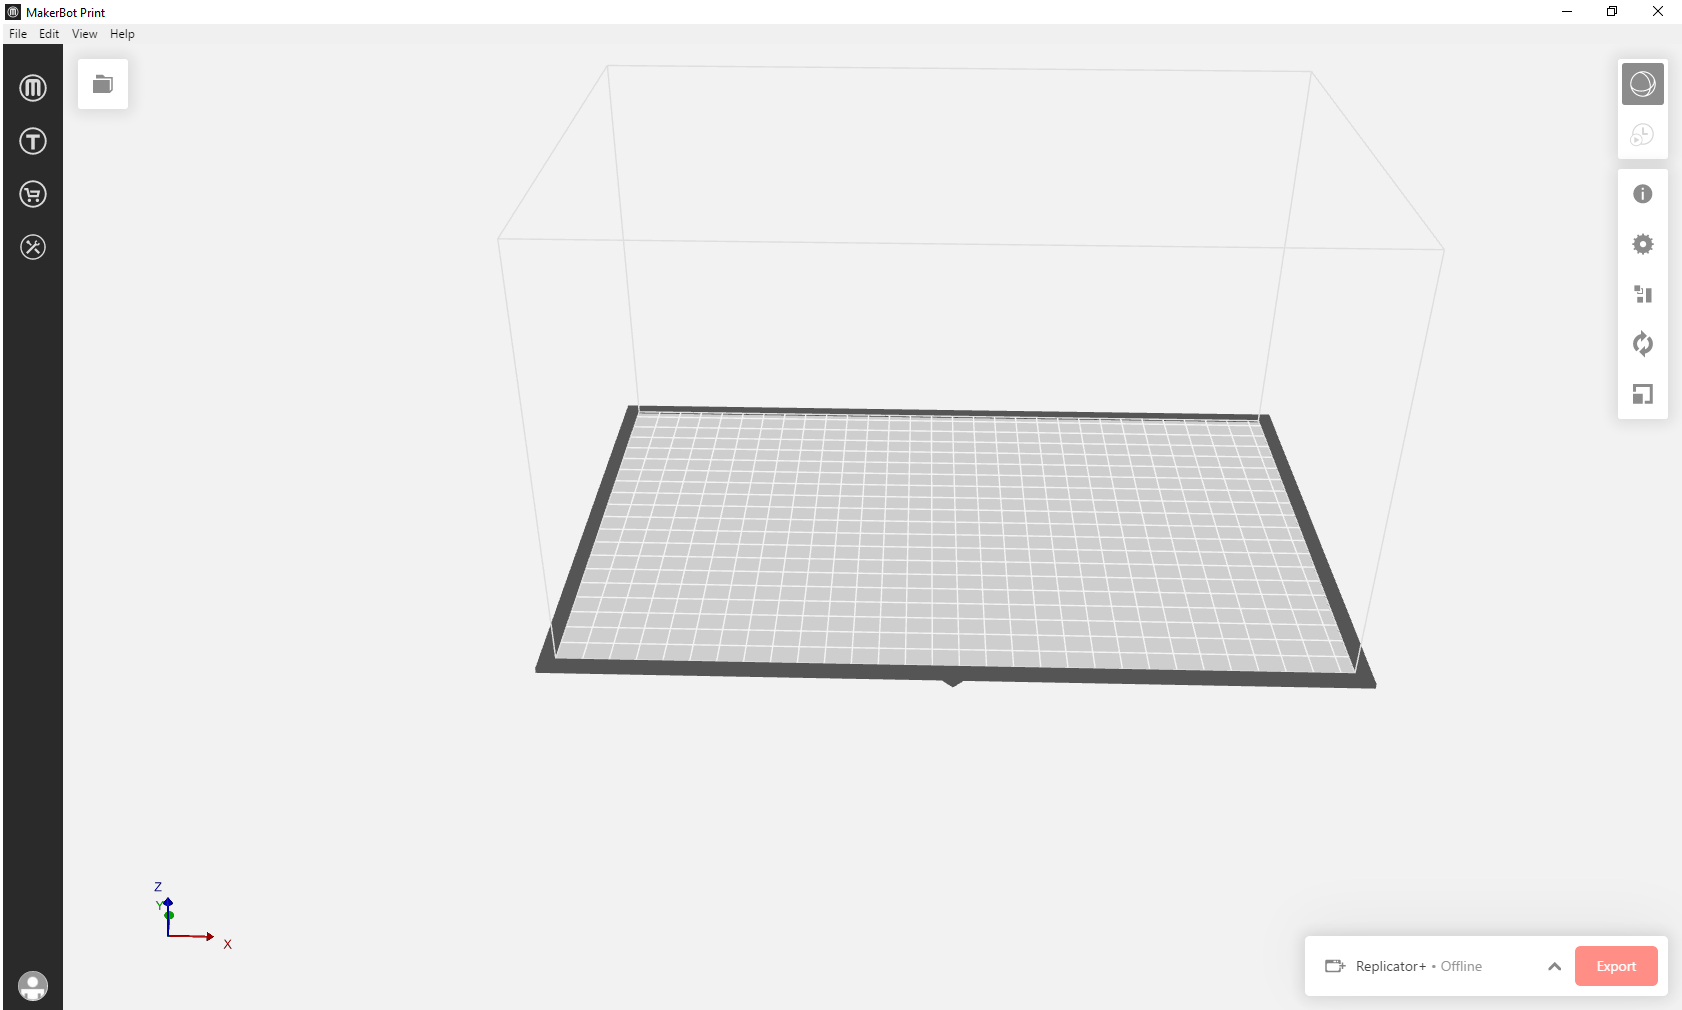
Once it launches, you will see a virtual build plate. The area within the gray rectangular box is the build area. Anything that falls outside the box is outside of the area that can be printed (and will cause those gray boundary lines to turn red). From here you can zoom in and out using the track wheel on the mouse, and rotate the build area in space by holding down the right mouse button and dragging the mouse.
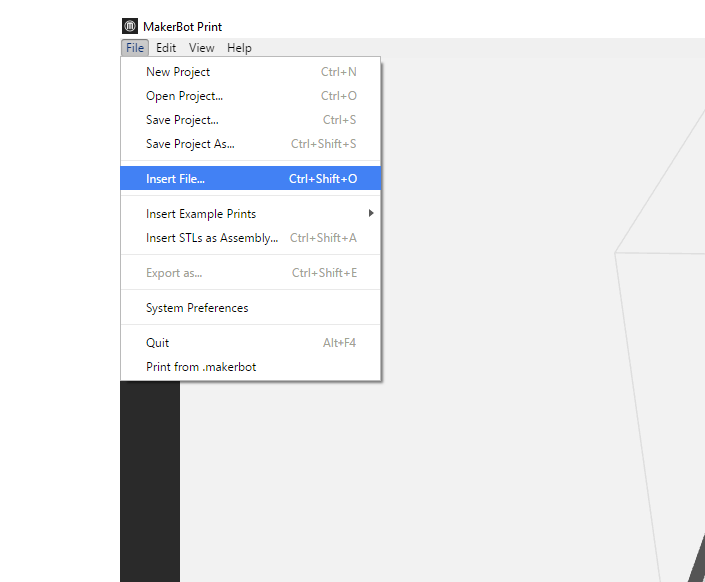
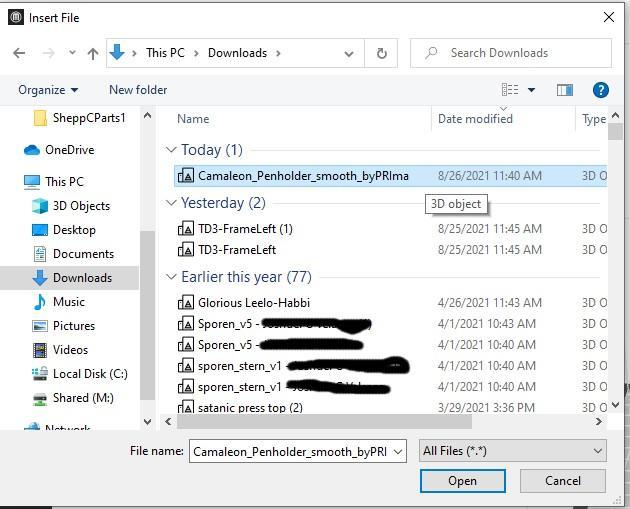
To load the file into the slicer, select the File menu in the top left corner, then select Insert File, or press CTRL + Shift + o to use the keyboard shortcut.
This will open a file browser. Find and select the model you just downloaded (it should end in either .obj or .stl) and click Open. [Personal information in print file names have been redacted]
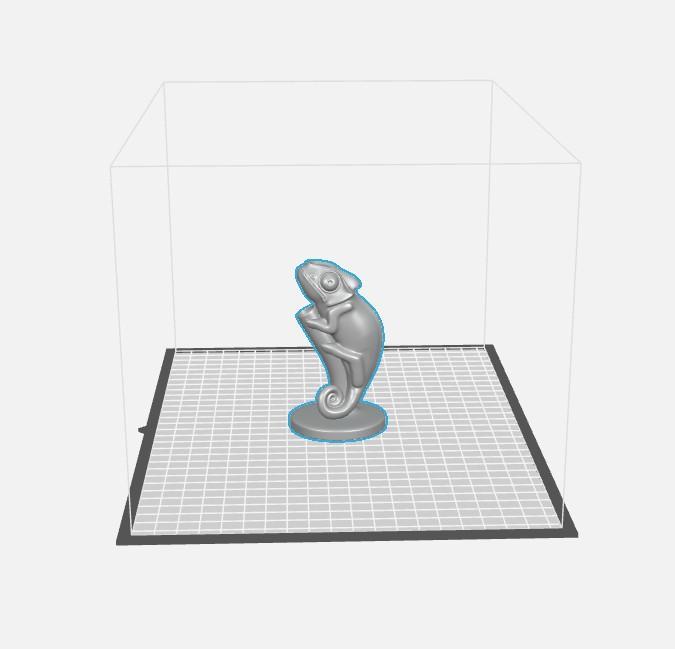
The model will appear in the build plate. You can drag it around using the left mouse button, and change your viewpoint with the right mouse button. There are other print adjustments you can make here, such as size (scale), orientation (what angle it’s facing), and print settings, but we will touch on those in future tutorials.
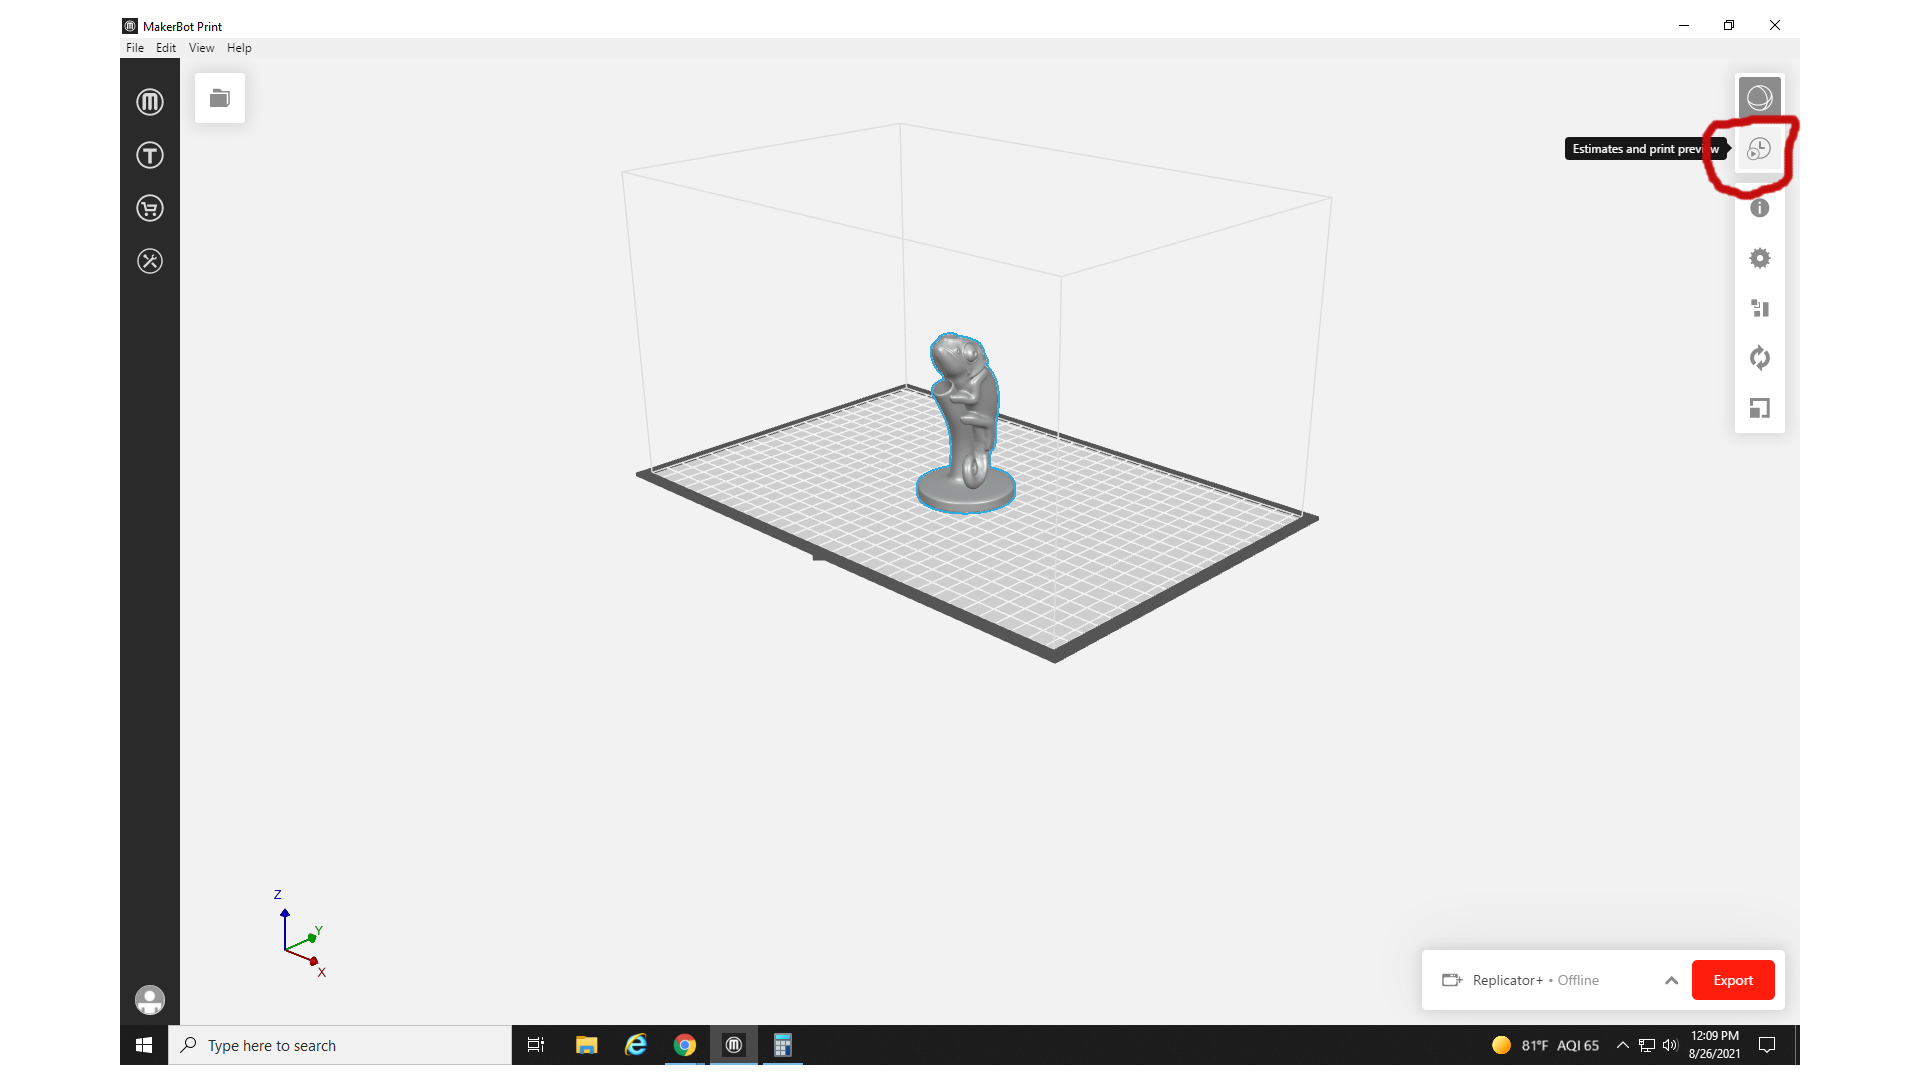
For now, since we are happy with Makerbot’s automatic arrangement, and don’t need to change the size or position or add supports, we can go ahead and let the software do its work. In a small box towards the top right of the screen, you’ll notice two icons – a sphere (for working with your model in a 3D plane) and a clock (for slicing the layers and plotting the printer’s movements over time). Click the clock, and a status bar will appear at the top of the screen – it can sometimes take a few minutes to process.
When the software is finished slicing, your model will appear green with a yellow disc on the bottom. This disc is the raft, a layer of solid material used to help the model adhere to the build plate. You can see the model’s interior slices and layers by sliding the white circle up and down the vertical line that has appeared on the left side of the workspace. The new horizontal line below the workspace allows you to track the planned movements of the 3D printer within each layer.
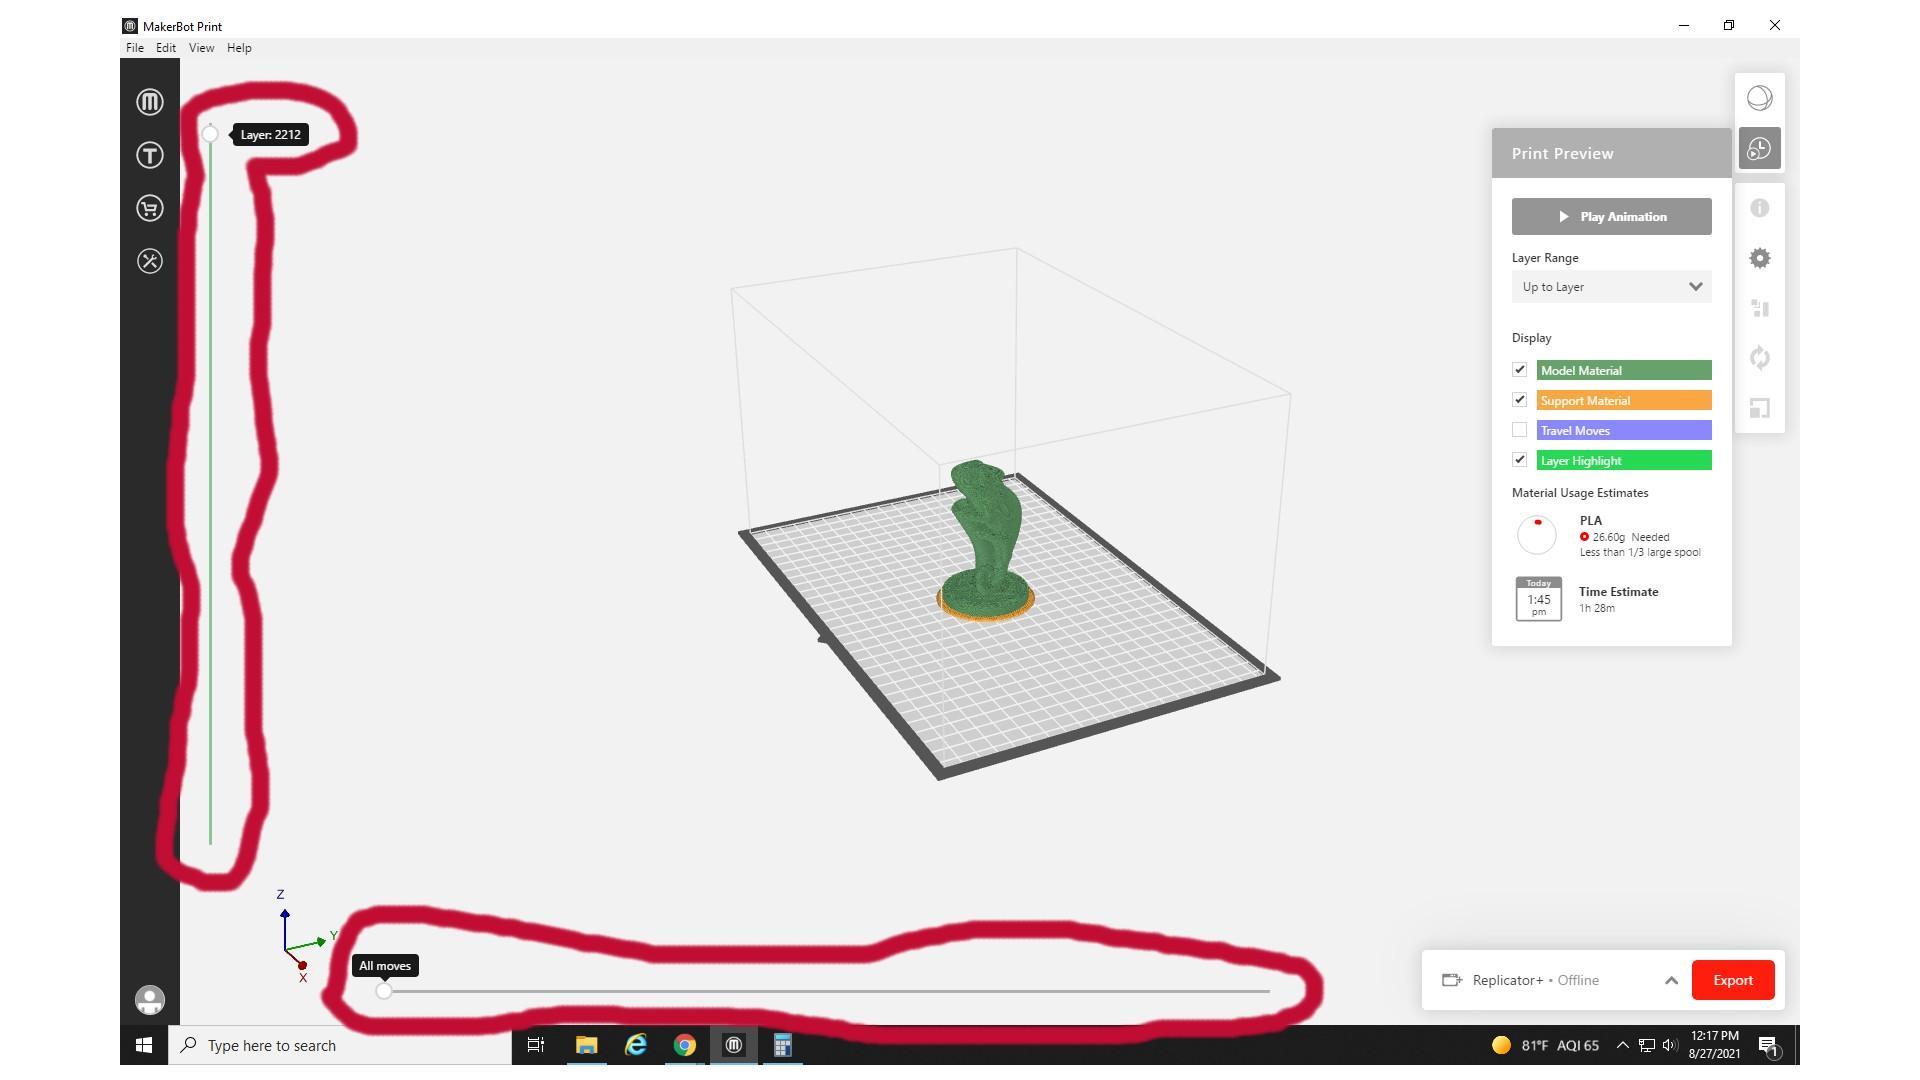
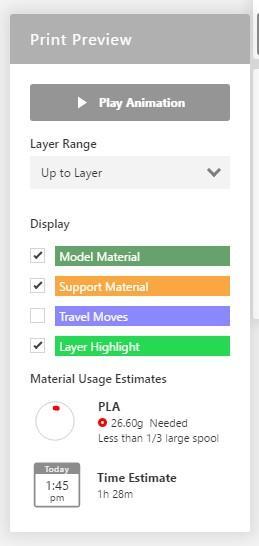
The most important section for today is the box that has popped up to the right of the build space. This allows you to replay the printing animation, change what parts of the print are shown, and give you the material usage estimate. As you can see here, the material usage estimate for our chameleon pen holder tells us that the print will take about an hour and 20 minutes, and will use 21.82 grams of PLA. And WOW, RE3D allows print requests up to 80 grams for free! We can definitely get this.
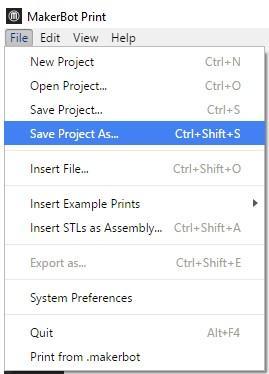
Next, we open the File menu and select Save Project As, or use the shortcut (Ctrl+Shift+S).
This will open up a File Explorer window for saving. You can choose where to save your files, but it’s best practice to put them in their own folder. After selecting where you want your folder to appear (ex. Desktop) right click anywhere in the File Explorer window, select New, and then select Folder.
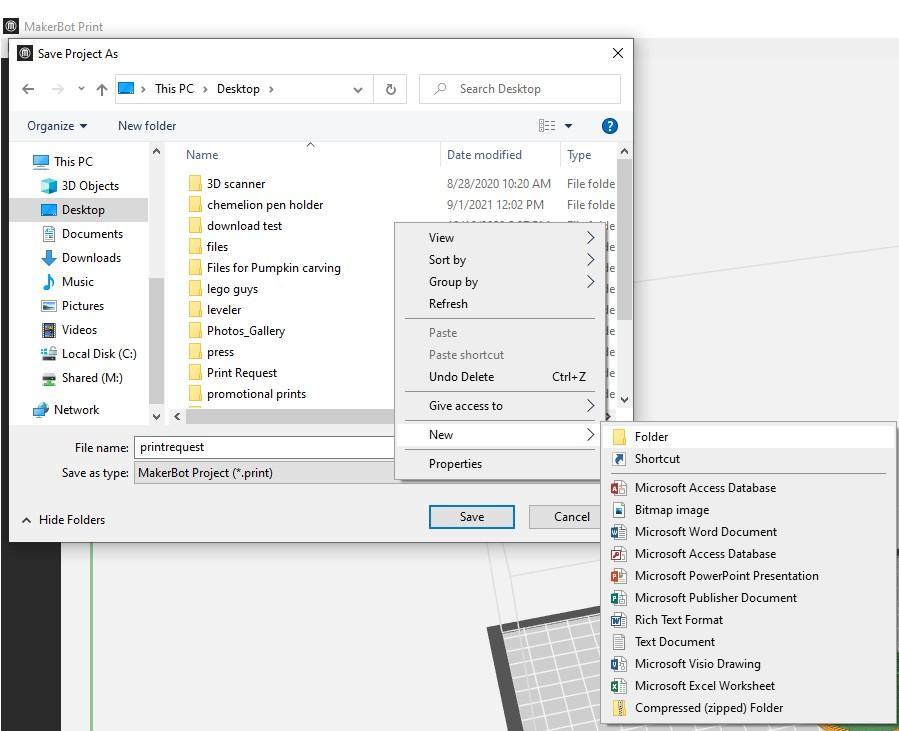
Name your folder whatever you like, but make it something you will recognize and be able to find. Once it’s named, double-click on your new folder.
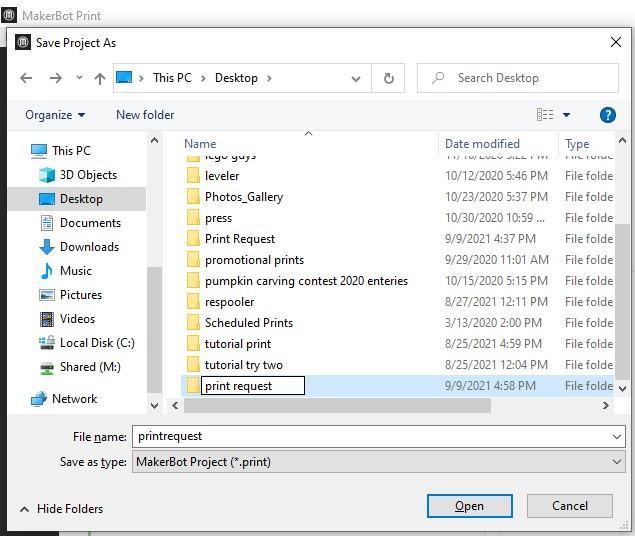
Within the new folder, choose a name for your print, and hit save.
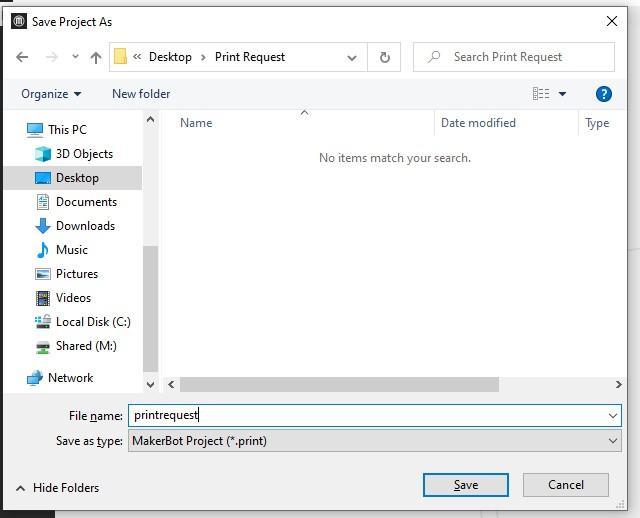
The File Explorer window will close, and you should see “Project has been saved successfully” appear briefly at the top of the screen.

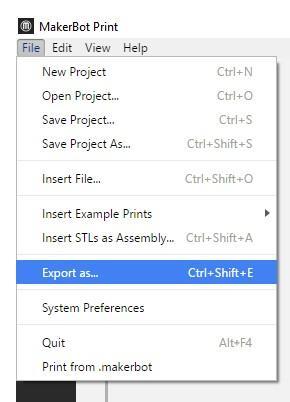
Now click File, and Export as.
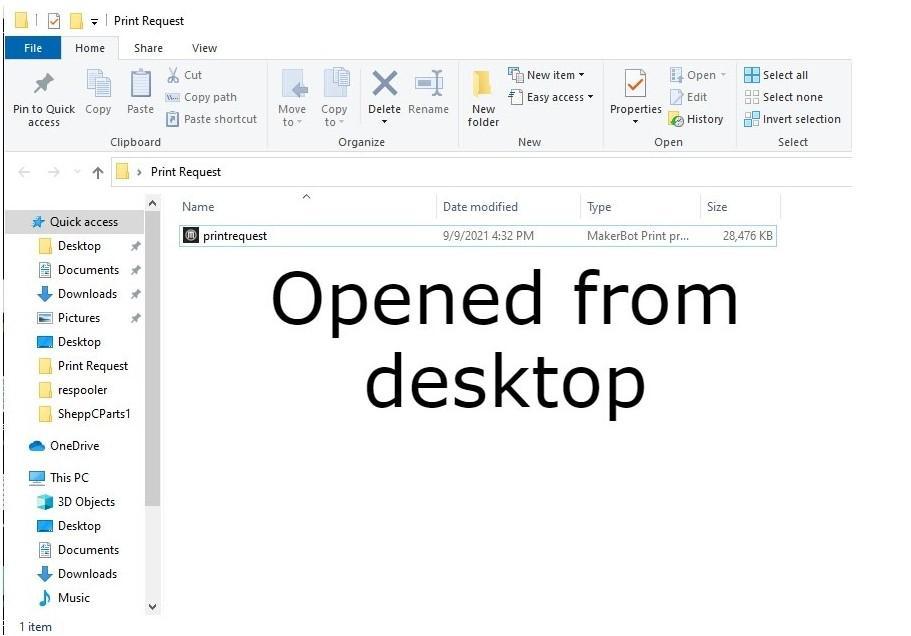
This will open another file browser. Find the file you created last time, and double click on it. It may appear empty, but the file you just saved should be visible in the File Explorer. The .print file contains your print and any settings you selected or changes you made to it. This is the file that will be used to print your model, but these files can only be seen in the MakerBot Print software.
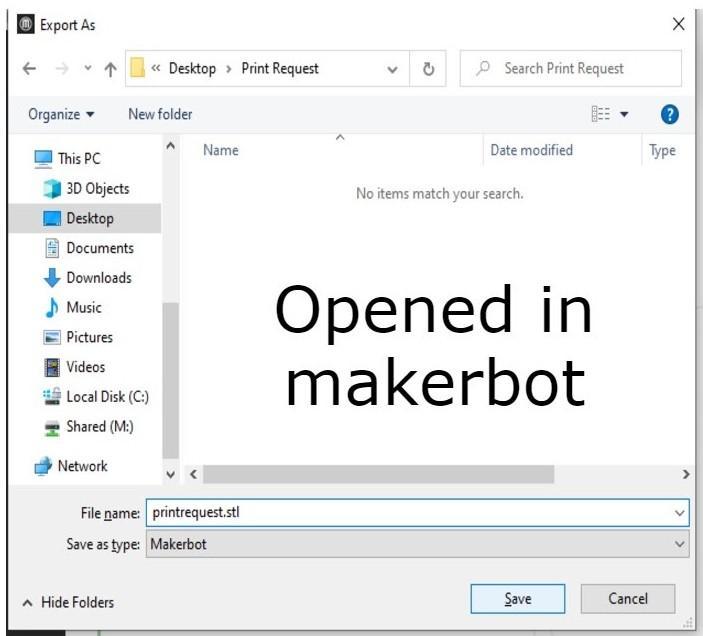
To make it easier for RE3D to approve your print, please export your print as a .stl file as well. Use the same name you used the first time, but add .STL at the end. This will save your file as an stl model that can be viewed in any Windows computer.
If you didn’t make any changes to the model before slicing this step can be skipped, but please include the .stl file you imported into MakerBot Print with your 3D print request.
And that’s all there is to it! You have now loaded a .stl file into the slicer software (MakerBot Print), sliced it, and exported it in two forms; a .makerbot file for printing, and an .stl file used to review and approve the print.
Of course, MakerBot Print is not the only free slicer software on the market; there are a variety of others, including Cura, which is a commonly chosen option. Although there may be small differences between the two software options (Cura, for example, has multiple support types to choose from while MakerBot Print only has one), the controls are very similar, and the slicing process is nearly identical. With Cura you would upload, slice, and export the model in the same way, albeit with menu icons. The primary difference between the two is rather than saving the file directly using the Save As command in MakerBot Print, you will export it twice in Cura, once as a .STL and once as .gcode.
Continue to follow this process in Chapter 3 to learn how to submit the files you just prepared to the RE3D request form to receive your model printed in PLA.
